Sample motor stack
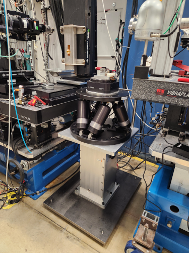
The sample motor stack consists of:
Sample top X – horizontal motion above the rotary stage
Sample top Z – horizontal motion orthogonal to Sample top X, above the rotary stage
Rotary stage – tomography rotation axis
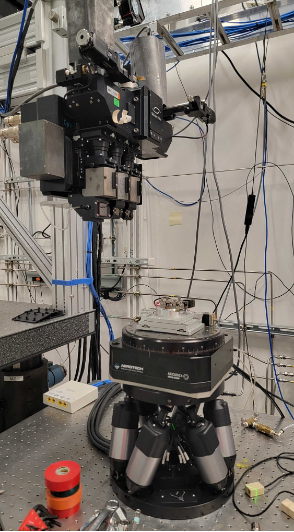
Hexapod – six axes (x, y, z, roll, pitch, yaw)
Sample top X/Z
The X and Z axes above the rotary stage use the Kohzu CYAT-070 crossed-roller alignment stage:
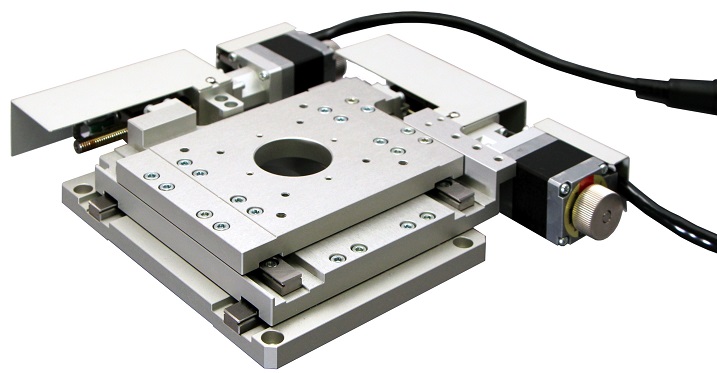
Kohzu CYAT-070 alignment stage (Sample top X and Z)
Rotary stage
Rotary stages in use:
Station |
Description |
Model |
Image |
Controller |
Speed (rpm) |
Axial load (kg) |
Info |
2-BM-B |
tomo |
ABS250MP-M-AS |
|
ENSEMBLEHLE10-40-A-MXH (*) |
500 |
66 |
|
2-BM-B |
fast tomo |
ABRS-150MP-M-AS |
|
ENSEMBLEHLE10-40-A-MXH (*) |
500 |
8 |
|
2-BM-B |
spindle |
ABS2000-1000AS-RU |
|
ENSEMBLEHLE10-40-A-MXH (*) |
6000 |
18 |
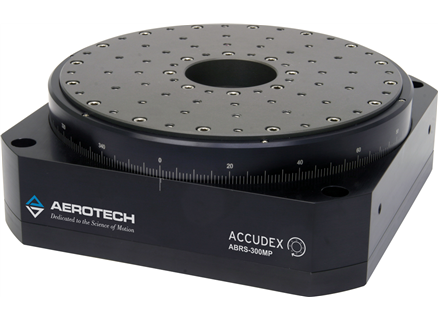
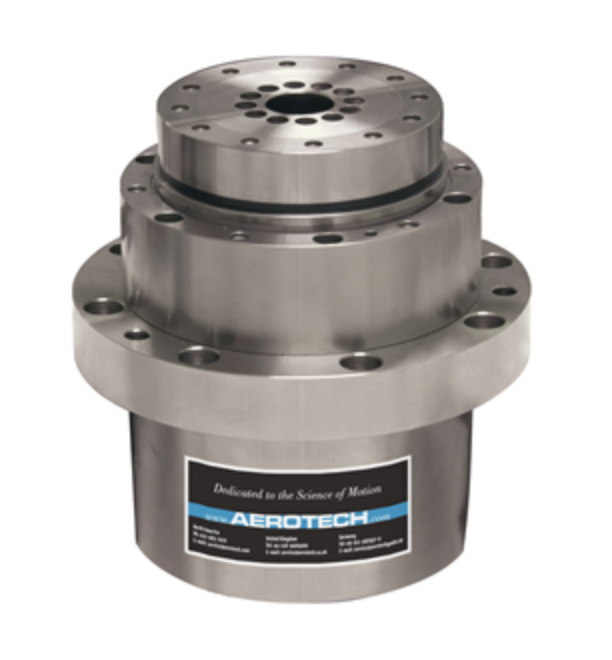
(*) Replaced with ENSEMBLEML10-40-IO-MXH.
Ensemble
The Ensemble parameter setup currently in use at 2-BM is documented in Ensemble Settings.
Parameter |
ABRS250MP |
ABRS150MP |
Units |
Fundamental encoder resolution |
11840 |
3600 |
lines/rev |
Encoder scale factor |
45 |
148 |
|
Encoder pulses per revolution |
532800 |
532800 |
pulses/rev |
Encoder resolution |
0.000675675675676 |
0.000675675675676 |
deg/pulse |
PSO
Details on Position Synchronized Output (PSO) are provided in the Aerotech Manual.
Hexapod
Available hexapods:
Station |
Model |
Data sheet |
Images |
Hardware manual |
USB stick delivered |
Quote |
2-BM |
HEX300-230HL-E1-PL4-TAS |
|
||||
7-BM |
HEX500-350HL-E3-PL4-TAS |
|
EPICS support
Start the hexapod tools on arcturus:
[2bmb@arcturus ~]$ bash
(base) 2bmb@arcturus ~ $ hexapod
Usage: 2bmHXP.pl {caqtdm|console|medm|phoebus|remote|restart|run|start|status|stop|usage}
Launch the caqtdm interface:
(base) 2bmb@arcturus ~ $ hexapod caqtdm
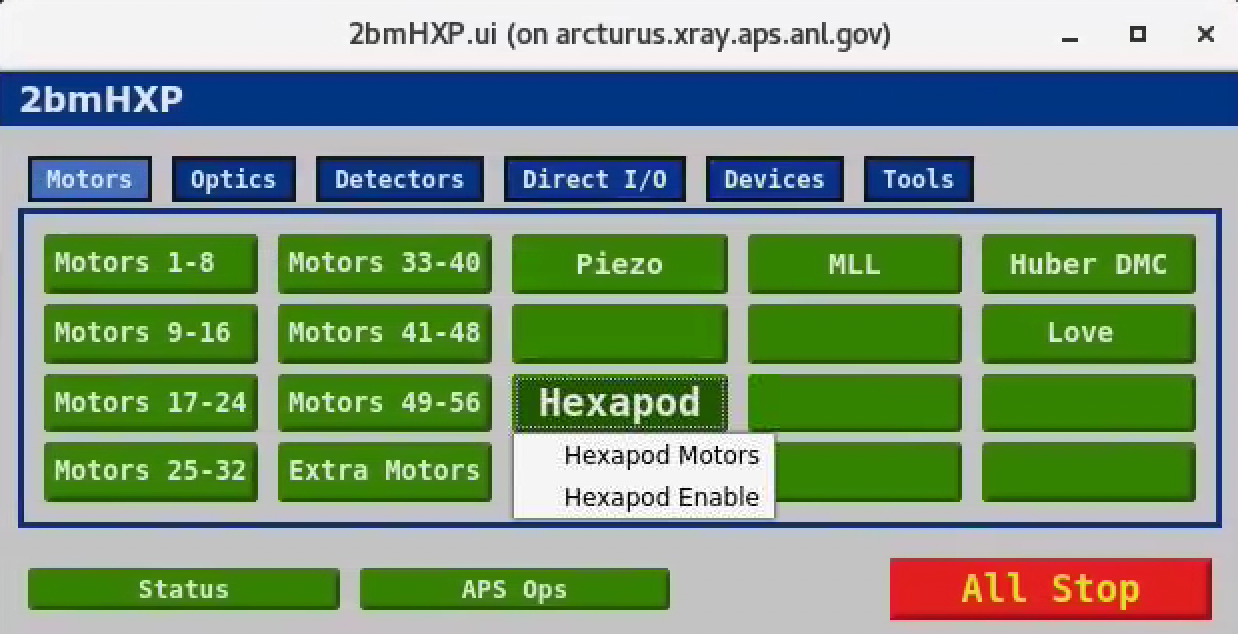
Hexapod control screen
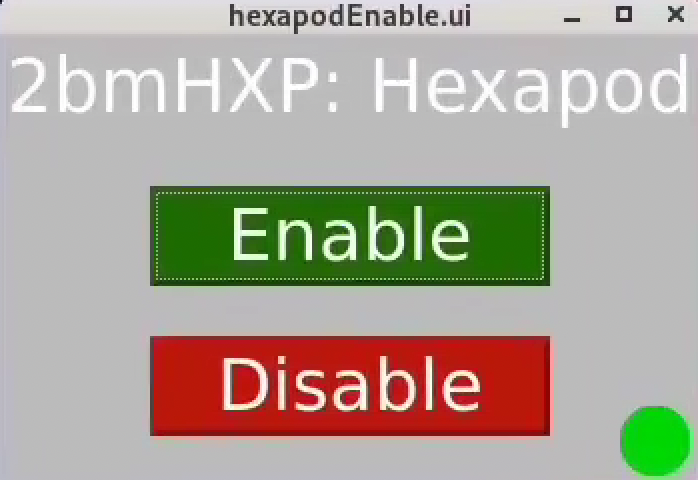
Hexapod enable screen
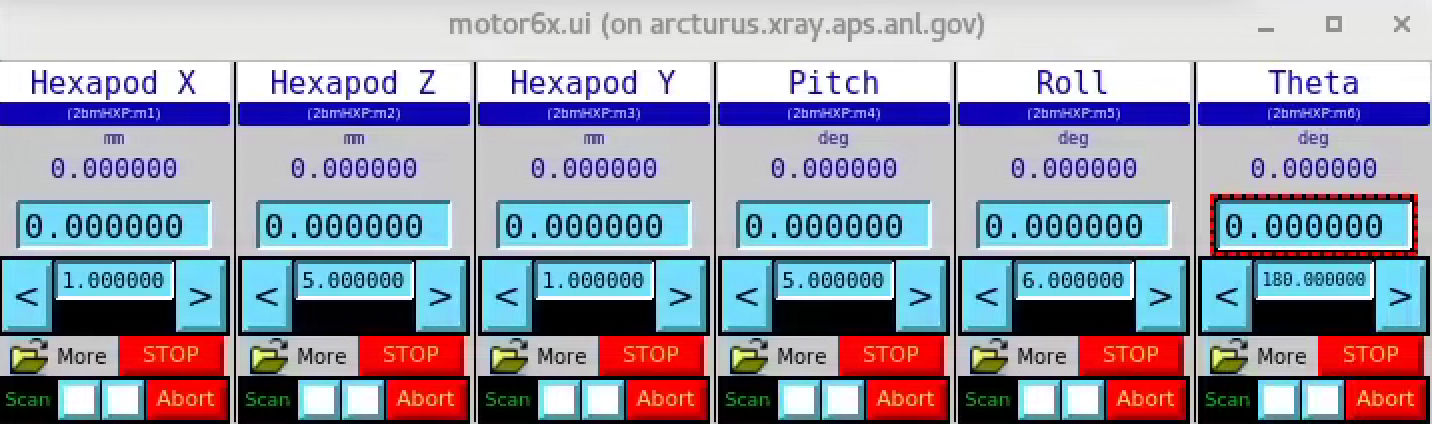
Hexapod motion control screen
Drive error recovery
A controller error can occur if the hexapod is commanded beyond its travel range, causing all axis drivers to disconnect. In this case, the Enable/Fault indicator, normally green, turns off.
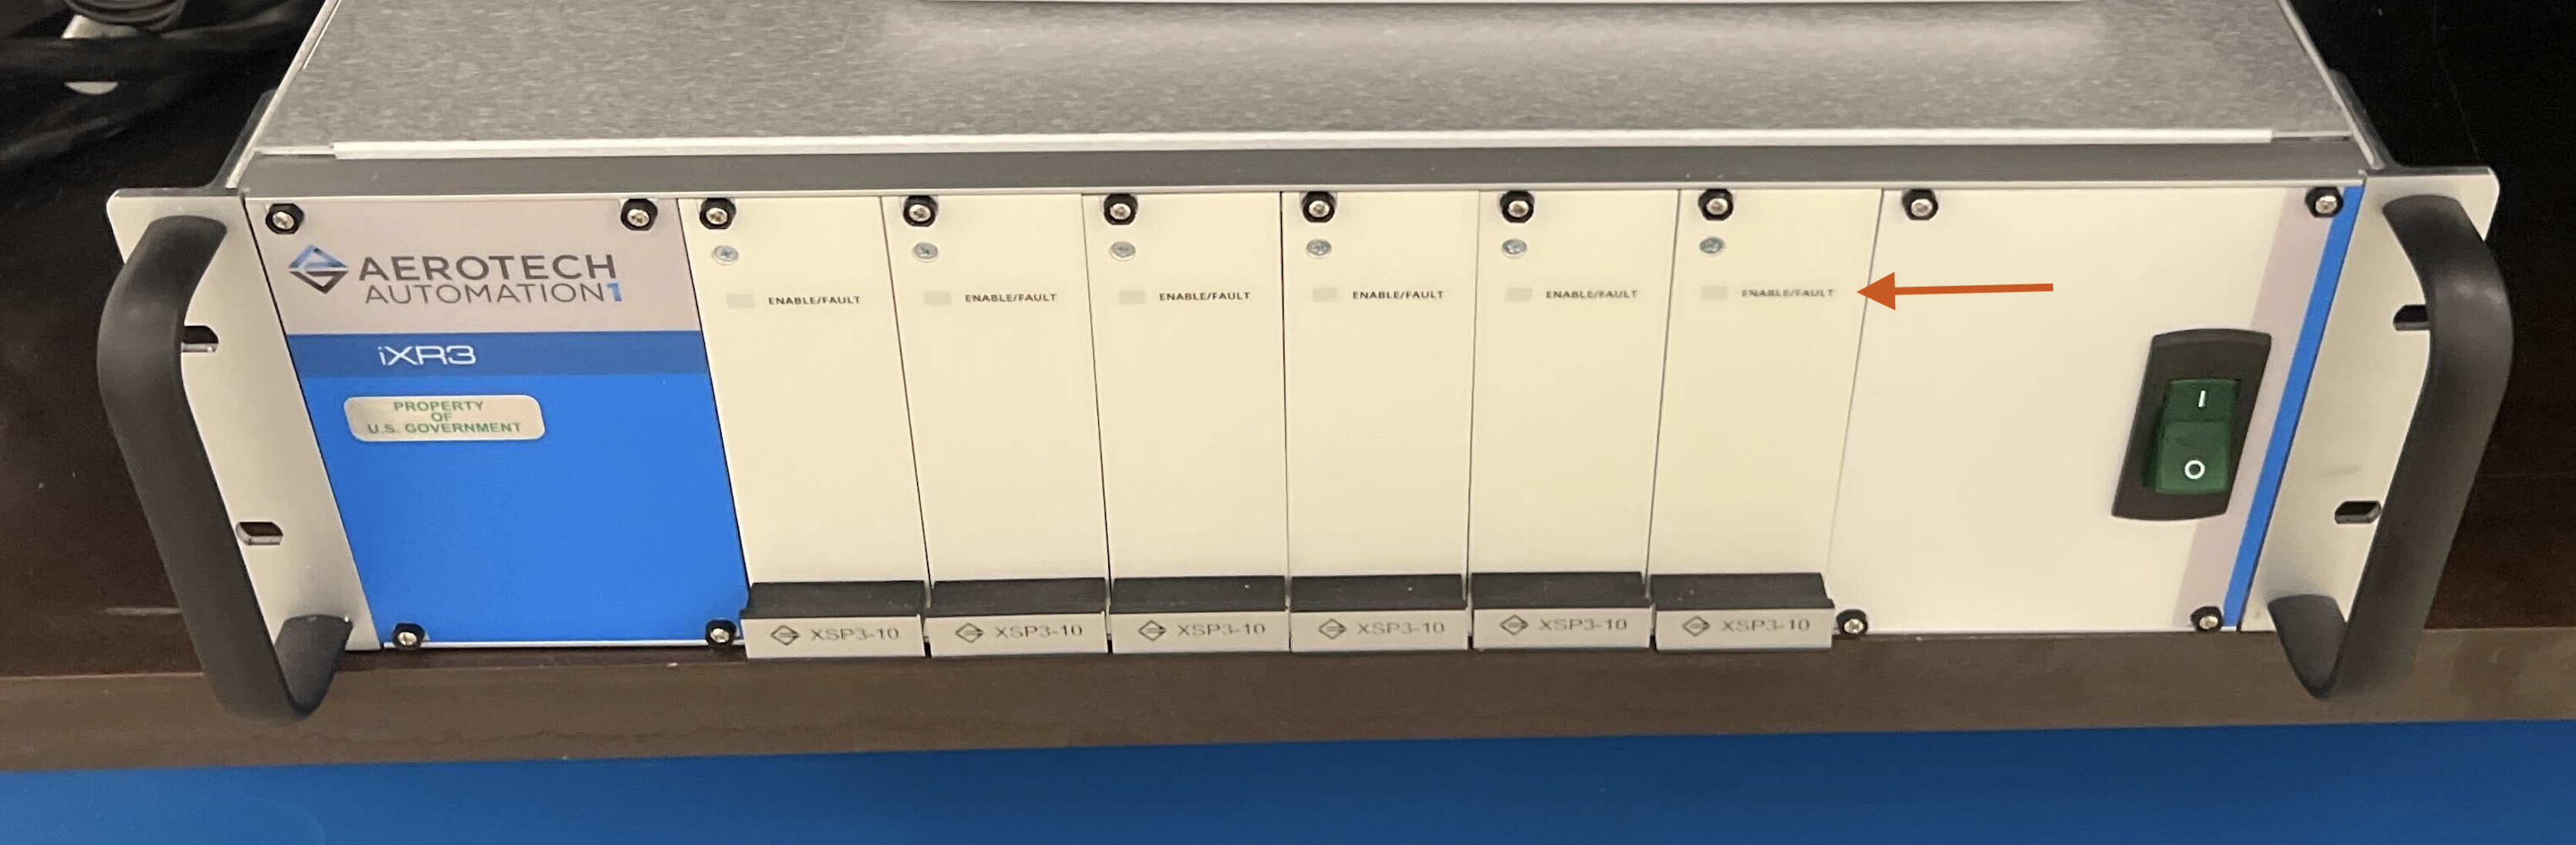
Hexapod controller. The arrow indicates the Enable/Fault status light.
To recover:
Stop the EPICS IOC controlling the hexapod.
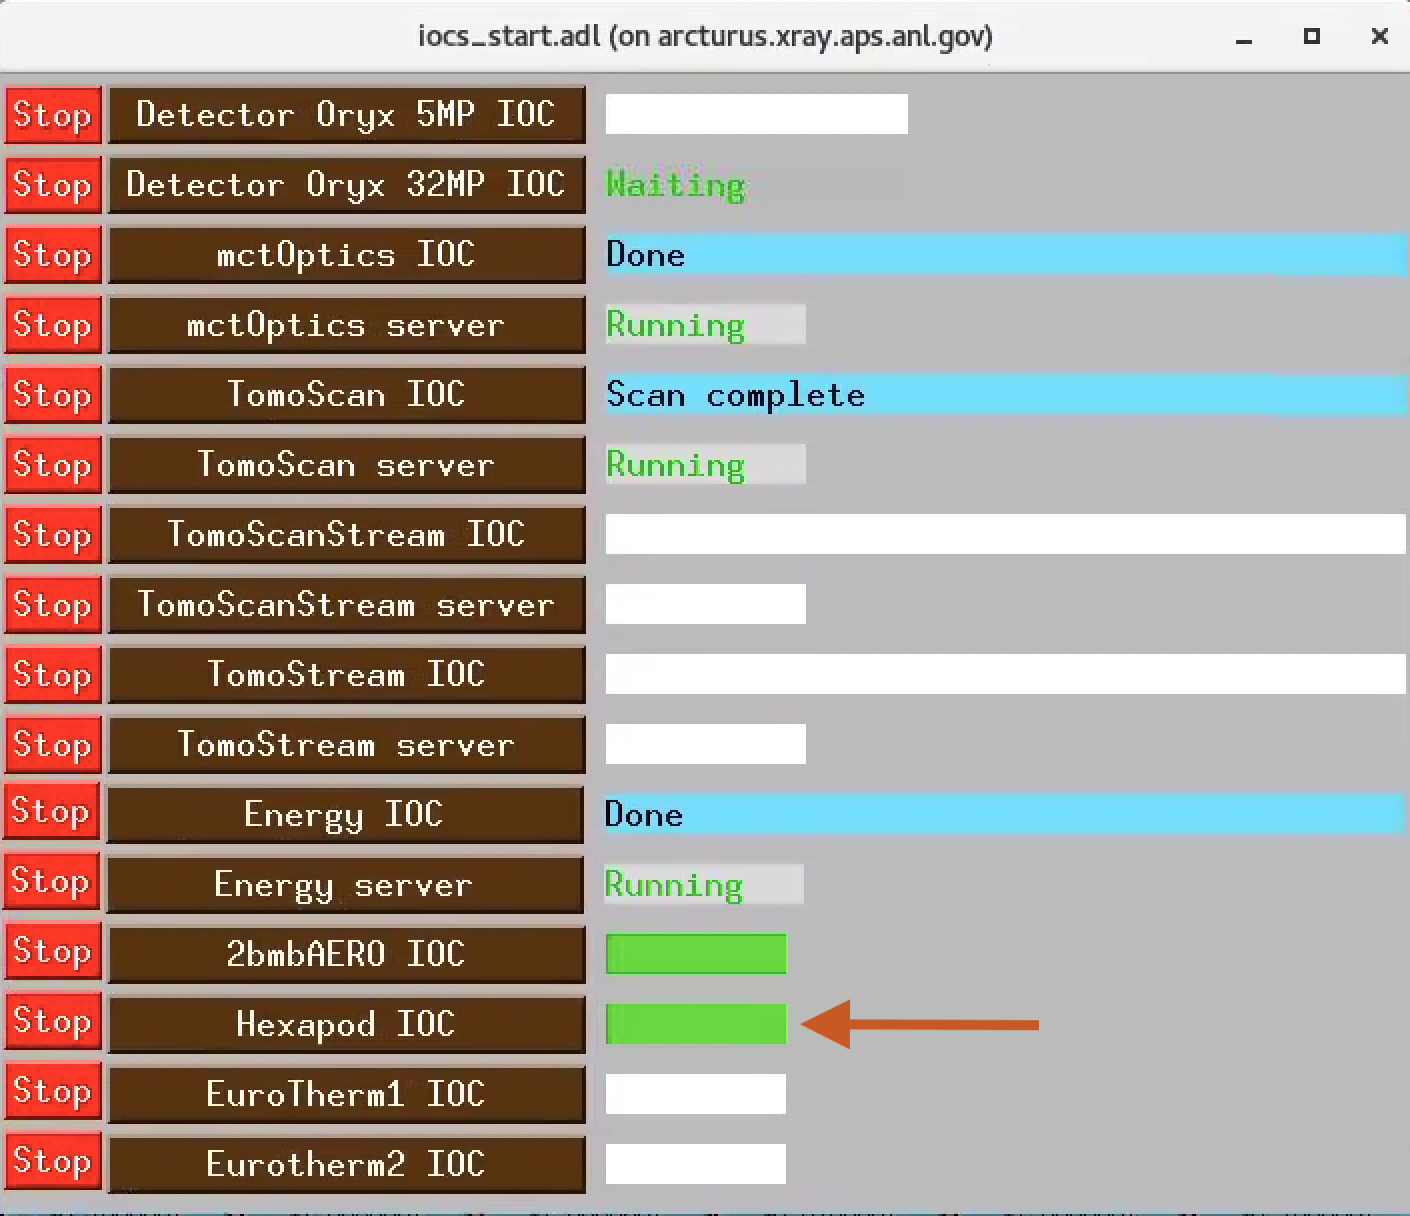
Hexapod EPICS IOC control
From the Tomo control screen, select PDU 1.
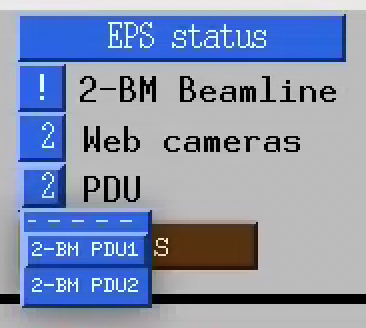
PDU selector
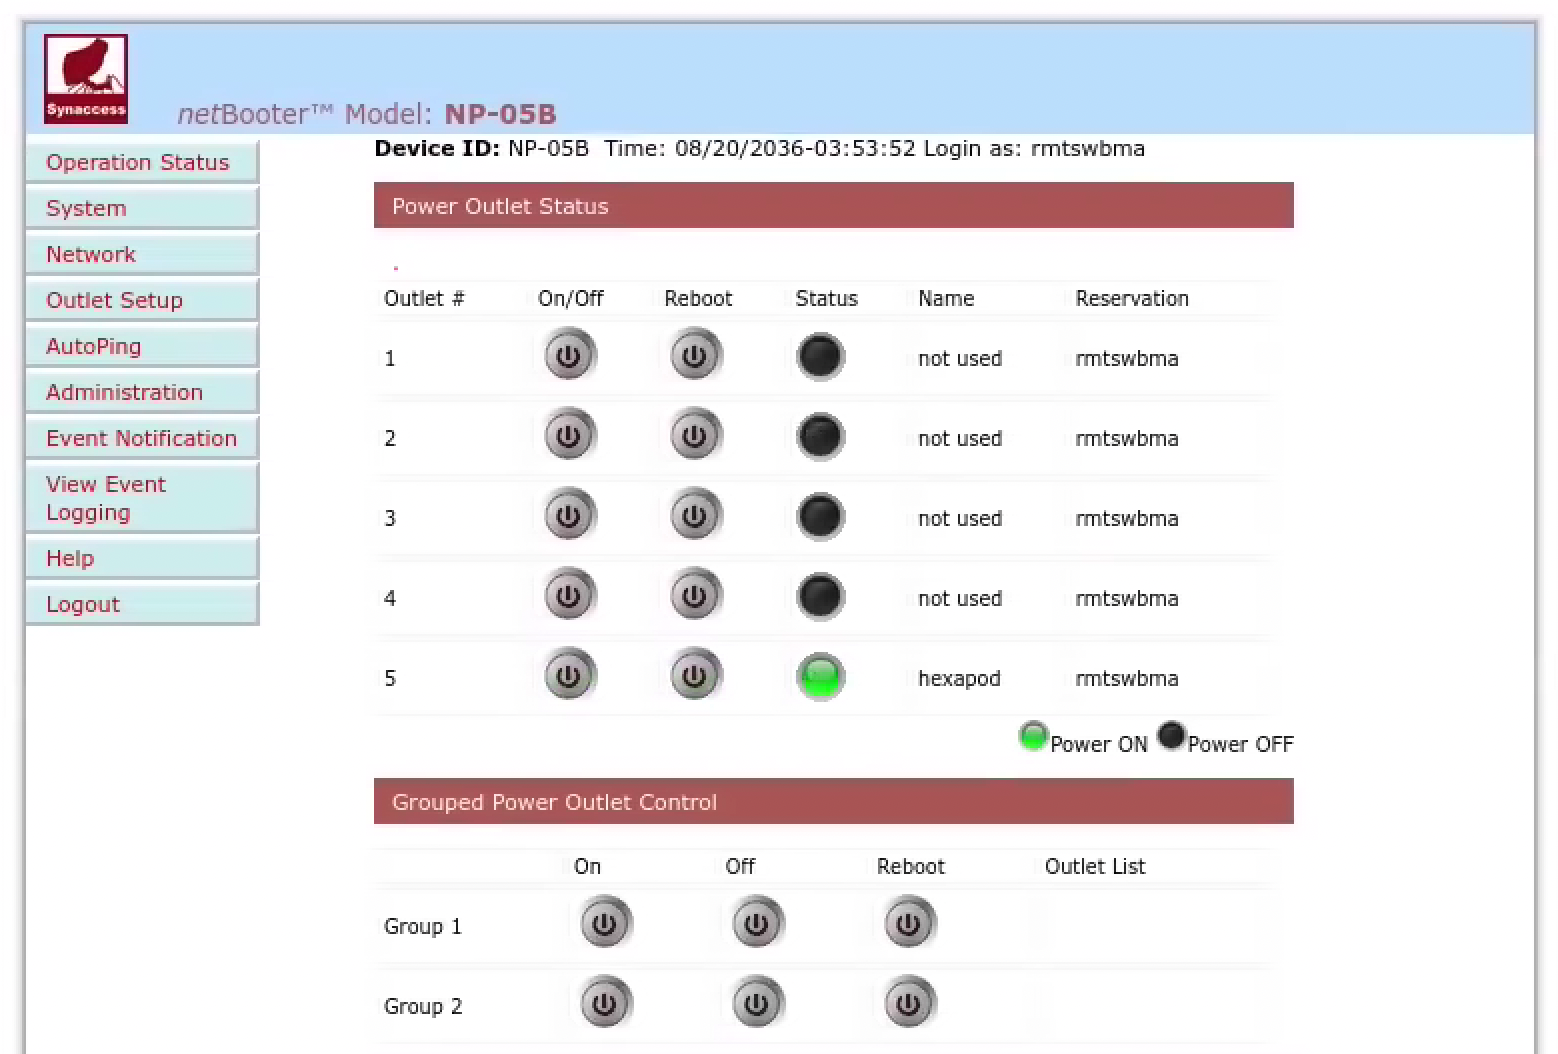
PDU web interface
Power-cycle outlet #5 (Hexapod).
Wait approximately 2 minutes, then restart the Hexapod EPICS IOC.
Verify that the controller is enabled.
After a few minutes, the hexapod will restart.
After reboot, all six hexapod axes are homed automatically as part of the reboot procedure — no manual dial adjustment is required.
Per-axis convention: user = dial home + OFFSET. For Y, the dial
home is 350 and the OFFSET is -350, so the Y user coordinate reads
zero at Y dial 350. Other axes have their own dial home + OFFSET
values chosen so their user coordinate at the homed position is
sensible for the beamline geometry.
Note
Earlier versions of this page described a “manual dial reset” workflow where the operator had to set the Y dial to 350 by hand after every reboot. That behaviour is obsolete — see the Fixed / obsolete behaviour subsection below for the historical record, or cora issue #597 (HXP-8) for the change record.
Fixed / obsolete behaviour
This subsection preserves the description of a hexapod-reboot quirk that has since been fixed. The workflow below is no longer required; kept here as a reference for anyone reading historical logs or comparing against the pre-fix screens.
Old behaviour (fixed 2026-07-28, cora#597 / HXP-8): after a reboot, all motions homed correctly (dial position and encoder readback both zero) except for Y. For Y:
Dial position was reset to zero (red arrow).
Encoder readback dial was at 350 (green arrow).
Attempting to move Y in this state would trigger a drive error.
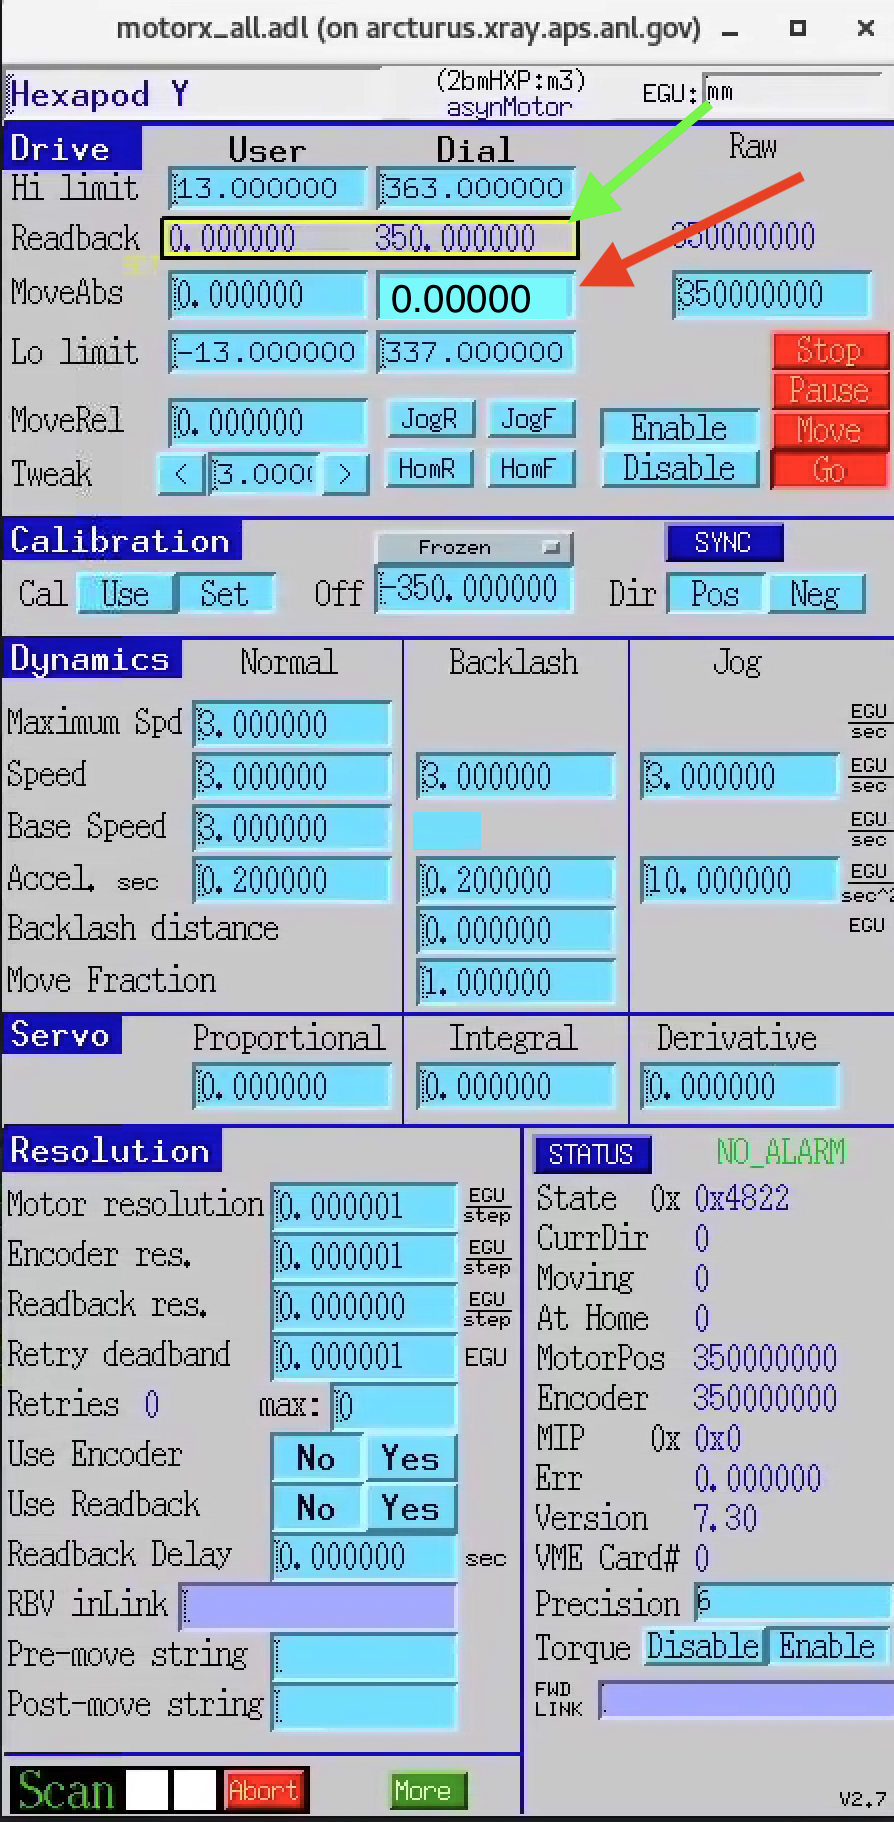
Hexapod Y after controller reboot (old behaviour — dial reset to 0 while encoder read 350).
The operator then had to set the Y dial manually to 350 before any Y move:
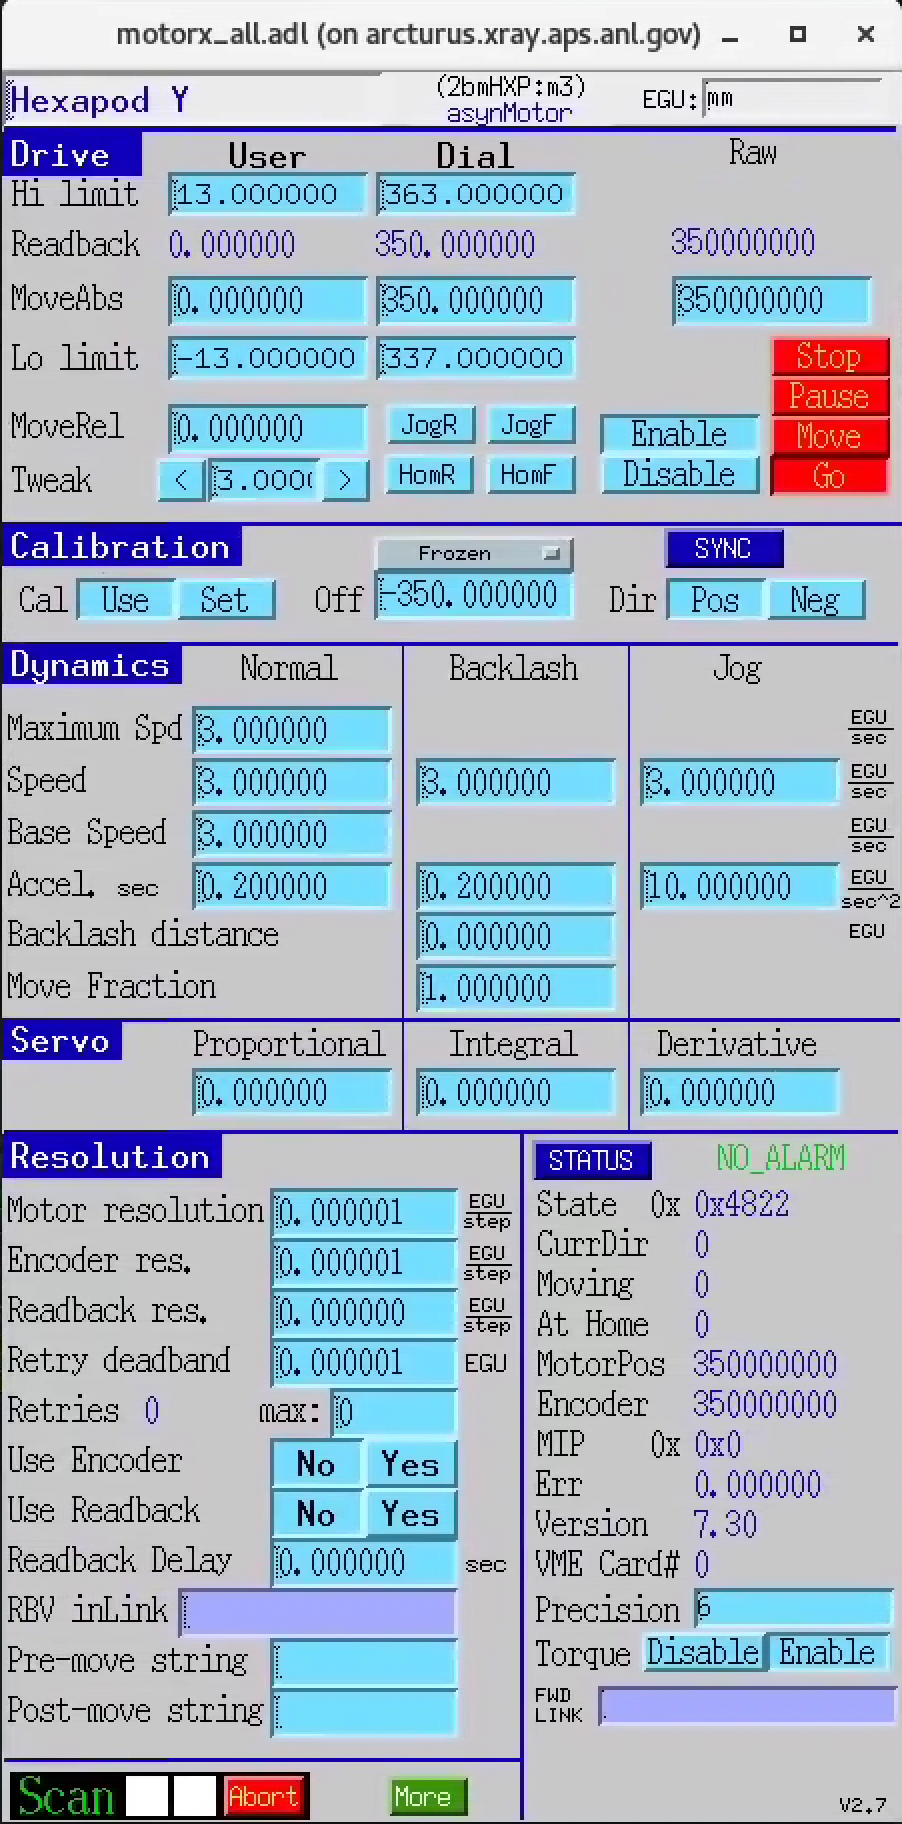
Hexapod Y dial manually set to 350 after controller reboot (old procedure).
Current behaviour (since 2026-07-28): the reboot procedure homes Y at 350 and sets the user coordinate to 0 automatically, as documented above. No manual dial adjustment is required.